
Main Courses
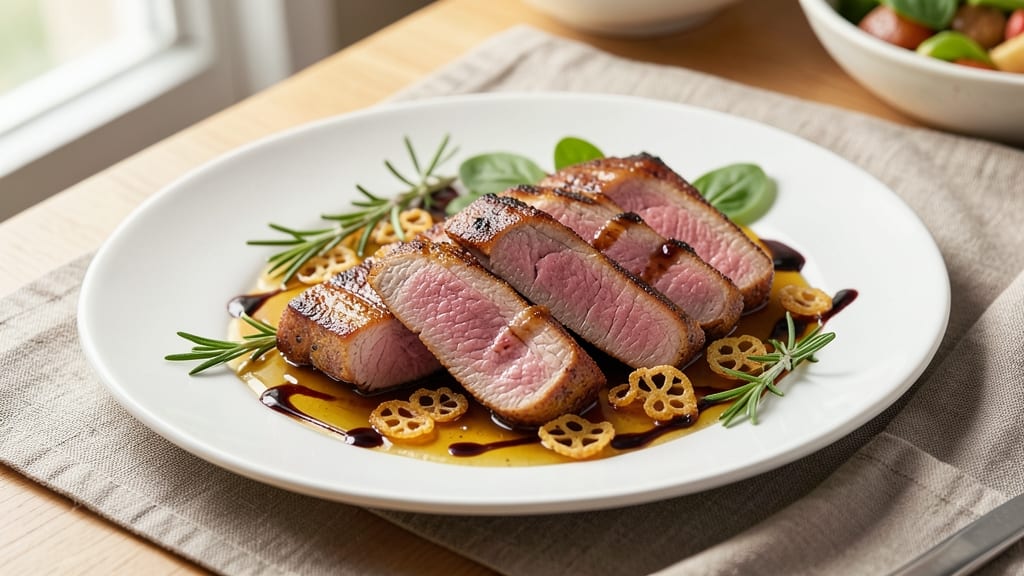
This boneless center-cut pork loin chops recipe delivers the perfect balance of crispy edges and juicy hearts every time. After years of perfecting my technique—especially with center-cut pork's tendency to dry out—I've cracked the code for foolproof results.
The secret lies in a high-heat sear followed by precise internal temperature control, ensuring tender meat without a trace of toughness.
What sets this recipe apart is the two-step cooking process: first, creating a golden-brown crust in a screaming-hot pan, then finishing in the oven to carry through the doneness.
I use a simple seasoning blend of salt, black pepper, and smoked paprika—just enough to enhance the pork's natural flavor without overpowering it. This method transforms tough cuts into melt-in-your-mouth perfection.
The result is a restaurant-quality dish that's surprisingly simple to achieve at home. Each chop emerges with a caramelized crust that contrasts beautifully with the tender, pink center. The technique works equally well for weeknight dinners or special occasions—just adjust your seasoning if you're serving guests who prefer milder flavors.
Pair these chops with a creamy apple sauce or roasted seasonal vegetables for a complete meal. The juiciness of the pork pairs wonderfully with acidity, balancing the richness perfectly. Let's get started—this recipe will become your go-to for pork loin chops that impress every time.
Ingredients for boneless center pork loin chops
Four chops, two steps, restaurant-quality results. The right ingredients make all the difference.
| Ingredient | Amount | Notes |
|---|---|---|
| Boneless Center-Cut Pork Loin Chops 🥩 | 4 whole | 1-inch thick, even cut |
| Kosher Salt 🧂 | 1 ½ tsp | Diamond Crystal preferred |
| Freshly Ground Black Pepper 🌶️ | ½ tsp | Coarse grind preferred |
| Smoked Paprika 🌶️ | ½ tsp | High-quality smoked |
| Extra-Virgin Olive Oil 🫒 | ½ cup | High smoke point preferred |
| Unsalted Butter 🧈 | 2 tbsp | Cold, cubed for searing |
| Fresh Rosemary 🌿 | 1 tbsp | Chopped, for garnish |
| Garlic Cloves 🧄 | 2 cloves | Minced for finishing |
| Apple Cider Vinegar 🍎 | 1 tbsp | For deglazing |
| Fresh Thyme Leaves 🌿 | ¼ cup | Chopped, for finishing |
| Vegetable Oil 🫒 | ¼ cup | For preheating pan |
The pork chops are non-negotiable—center-cut is key for juiciness, and 1-inch thickness ensures even cooking. Costco or Whole Foods carry the best cuts, but any butcher will trim them to your specs. Look for chops with good marbling—they'll stay juicier. I always buy a few extra in case of uneven cuts. For the smoked paprika, Penzeys or the bulk bin at Trader Joe's are my go-tos—avoid the cheap grocery store brands that taste like dust.
No smoked paprika? Regular paprika plus a pinch of liquid smoke works in a pinch, but trust me on the real deal. The butter needs to be cold and cubed—don't skip this. Fresh rosemary and thyme are ideal, but dried works at half the amount if you're in a bind. For the vinegar, apple cider adds brightness, but white wine vinegar is a solid swap. The olive oil should have a high smoke point—Avocado oil is my secret weapon for searing. And if you're worried about the chops drying out, brine them for 30 minutes before cooking.
These chops reheat beautifully—just a quick pan sear with a splash of water brings back that crispy crust. Store leftovers in the fridge for 3-4 days, wrapped tightly in foil. For longer storage, freeze for up to 3 months. I always make a double batch—one for dinner, one for lunches. The pan drippings? Save them—they make an amazing gravy when reduced with a splash of broth.
Why You'll Love This Recipe
- Pan-Fry Perfection: I swear by this method—just a hot skillet, a drizzle of olive oil, and those chops sizzle into golden, juicy slices in minutes. No fancy equipment, no stress, just pure satisfaction from the first bite.
- Smoky-Spiced Magic: That smoked paprika? It’s the secret weapon here—earthy, warm, and just a little bit addictive. A pinch of salt and pepper lets the pork’s natural flavor shine, but the paprika turns it into something special every time.
- Weeknight Wonder: Between us, this is my go-to when I’m too tired to plan. Toss some roasted potatoes or a simple salad alongside, and dinner’s ready before the kids even notice we’re eating. (Yes, even on a Tuesday night.)
- Budget-Friendly Feast: A single pork loin gives me six chops, and they reheat beautifully for lunches or leftovers. Honestly, it’s one of those recipes where you end up making double just to have seconds—without breaking the bank.
Step-by-step instructions for boneless center-cut pork loin chops
Here's how to achieve perfect pan-seared pork chops with crispy edges and tender centers every time.
Season the Pork Loin Chops Generously
Start by patting the 4 whole boneless center-cut pork loin chops completely dry with paper towels. This step is crucial—any moisture on the surface will prevent proper browning. Place the chops on a clean cutting board and season both sides evenly with the 1.5 teaspoons kosher salt, 0.5 teaspoon freshly ground black pepper, and 0.5 teaspoon smoked paprika. I like to press the spices into the meat gently so they adhere well and penetrate slightly. Let the seasoned chops sit at room temperature for 15-20 minutes while you prepare the rest of your ingredients. This resting time ensures even cooking and better flavor development.
Here's the thing—don't skimp on the seasoning. The smoked paprika adds depth, while the coarse black pepper gives a nice textural contrast. The kosher salt, with its larger crystals, dissolves slowly and penetrates the meat more effectively than table salt. Trust me, you'll taste the difference in the final result.
Preheat the Pan and Sear the Chops
Heat a large skillet over medium-high heat until it's smoking hot. Add the 0.25 cup vegetable oil and swirl to coat the bottom evenly. The oil should shimmer but not smoke excessively—this indicates it's ready for searing. Place one pork chop in the pan and let it sit undisturbed for 2-3 minutes. You'll hear a satisfying sizzle as the meat releases its moisture and begins to brown beautifully. This initial sear creates that coveted crust we're after.
I press down gently on the chop during the first minute to prevent it from curling and ensure even contact with the pan. After about 2 minutes, carefully flip the chop and add 1 tablespoon of the cold cubed unsalted butter to the pan. The butter will foam and bubble as it melts, basting the meat with rich, flavorful fat. Continue cooking for another 2-3 minutes on the second side until it reaches an internal temperature of 140°F—this ensures juicy, medium-rare pork. Repeat this process with the remaining chops, adding the rest of the butter as needed.
Deglaze and Finish with Herbs
Once all chops are cooked to 140°F and have a beautiful golden-brown crust, remove them from the pan and set them aside on a warm plate. Here's where we capture all those delicious browned bits that have settled at the bottom of the pan. Reduce the heat to medium and add the 1 tablespoon apple cider vinegar. The vinegar will immediately begin to bubble and sizzle as it reacts with the caramelized fond.
Let the vinegar simmer for about 1 minute until it reduces by half, then add the 2 minced garlic cloves and cook for another 30 seconds until fragrant. Stir in the 0.25 cup fresh thyme leaves and 1 tablespoon chopped fresh rosemary, letting the herbs infuse into the sauce for about 1 minute. This aromatic mixture will elevate the simple pan sauce to something truly special. If the sauce seems too thick, add a splash of water or the pork's juices from the plate to loosen it slightly.
Rest and Serve with Pan Sauce
Return the pork chops to the skillet and spoon the herb-infused pan sauce over the top. Let them rest for 5-7 minutes—this is absolutely critical for keeping the juices inside the meat. The resting period allows the temperature to equilibrate, preventing any potential dryness when you cut into them. During this time, the chops will carry over to about 145°F, which is perfect for medium-rare doneness.
To serve, transfer the chops to warm plates and drizzle generously with the pan sauce. Garnish with additional chopped rosemary if desired. Each chop should have a beautiful mahogany crust on the outside and a pink, juicy center that practically melts in your mouth. The herb-infused sauce adds a bright, aromatic finish that complements the rich pork perfectly. Serve immediately with your choice of sides—roasted vegetables, mashed potatoes, or a fresh salad all work beautifully.
Pro Tips For Making Boneless Center Pork Loin Chops
- PAT THE CHOPS DRY: Grab paper towels and press them hard into every surface—no wet spots, no exceptions. I learned this the hard way when my first batch turned out greasy instead of crispy. The drier the meat, the better the crust forms with that olive oil.
- SEAR IN BATCHES: Crowd the pan, and you’ll steam the chops instead of searing them. Start with a single layer in a hot skillet, wait 2-3 minutes per side until deep golden, then move the finished ones to a plate. Your pan stays hot, and the chops get that restaurant-quality crust.
- SALT BEFORE HEAT: Don’t wait until the pan’s screaming hot—season the chops right after patting them dry. The salt needs time to work its magic into the meat before it hits the oil. I used to rush this, and the flavor just wasn’t as bold.
- REST UNDER FOIL: Pull the chops off heat, tent them loosely with foil, and let them sit for 5 minutes. Skipping this step means juices pooling on the cutting board instead of redistributing inside. (Yes, even if you’re impatient like me.)
Make-ahead tips for this recipe
Prep Ahead Strategy
Season the chops up to 24 hours ahead and store them in an airtight container in the fridge. I wrap each chop individually in plastic wrap and place them on a tray lined with parchment paper.
This prevents them from sticking together and makes them easier to handle later. The flavors meld beautifully overnight, giving you that restaurant-quality depth without any extra effort. 💫
Cooking in Batches
For large gatherings, cook half the chops now and refrigerate them in a single airtight container for up to 2 days. When ready to serve, reheat them in the same skillet over medium heat for 3-4 minutes per side until they reach 165°F internally.
The key is to keep them wrapped in foil while reheating to prevent drying out. I always make a double batch—one for dinner and one for lunches the next week.
Freezer-Friendly Method
Freeze the seasoned chops in a single layer on a tray before transferring them to a freezer-safe bag. This prevents them from sticking together. When ready to cook, thaw them in the fridge overnight.
I've found that frozen chops reheat just as well as fresh ones, making this perfect for meal prep. Just add 2-3 extra minutes to the cooking time to ensure they're fully cooked through.
Sauce Prep Shortcut
Make the pan sauce ahead of time by combining the apple cider vinegar, minced garlic, and fresh herbs in a small saucepan. Simmer for 5 minutes and store it in an airtight container in the fridge for up to 3 days.
When ready to serve, simply warm it up in the same skillet you used for searing. This saves you time and ensures you always have a flavorful sauce ready to go.
Make-Ahead Sides
Prep your sides ahead of time to create a complete meal. Roasted vegetables can be made a day in advance and reheated in the oven at 375°F for 10 minutes. Mashed potatoes can be stored in the fridge for 3 days and reheated with a splash of milk.
I often make a big batch of creamy apple sauce and store it in the fridge for up to 5 days. This way, you can focus on cooking the chops fresh when it's time to serve.
Nutrition facts
Frequently asked questions
Why is center-cut pork loin better than regular pork chops?
Center-cut pork loin chops are far more tender because they come from the most tender portion of the loin, with less connective tissue. The 1-inch thickness ensures even cooking, while the center-cut guarantees juiciness throughout. Regular pork chops often have more fat and connective tissue that can make them tougher. For this recipe, the center-cut delivers that melt-in-your-mouth texture we all crave!
Can I cook these chops in the oven instead of pan-searing?
Preheat your oven to 400°F and place the seasoned chops on a wire rack over a baking sheet. Roast for 12-15 minutes until they reach 145°F internally. For extra crispiness, broil for 2-3 minutes at the end. The pan sauce can still be made separately by deglazing a skillet with vinegar and herbs. This method works especially well for larger batches.
What if my pork chops come out dry?
Dry chops usually mean they cooked too long or weren't rested properly. Always use a meat thermometer—145°F is perfect for medium-rare. Let them rest for 5-7 minutes before cutting to lock in juices. If they're still dry, try brining them for 30 minutes before cooking next time. The butter basting step in the pan-sear method is also key for moisture!
How do I adjust the seasoning for different palates?
For milder flavors, reduce the smoked paprika to ¼ teaspoon and use half the black pepper. For bolder flavor, add ½ teaspoon garlic powder and a pinch of cayenne. Kids might prefer just salt and pepper, while adults often enjoy the depth of the smoked paprika. Always taste as you go—seasoning can be adjusted after the initial sear before the final cook.