
Main Courses
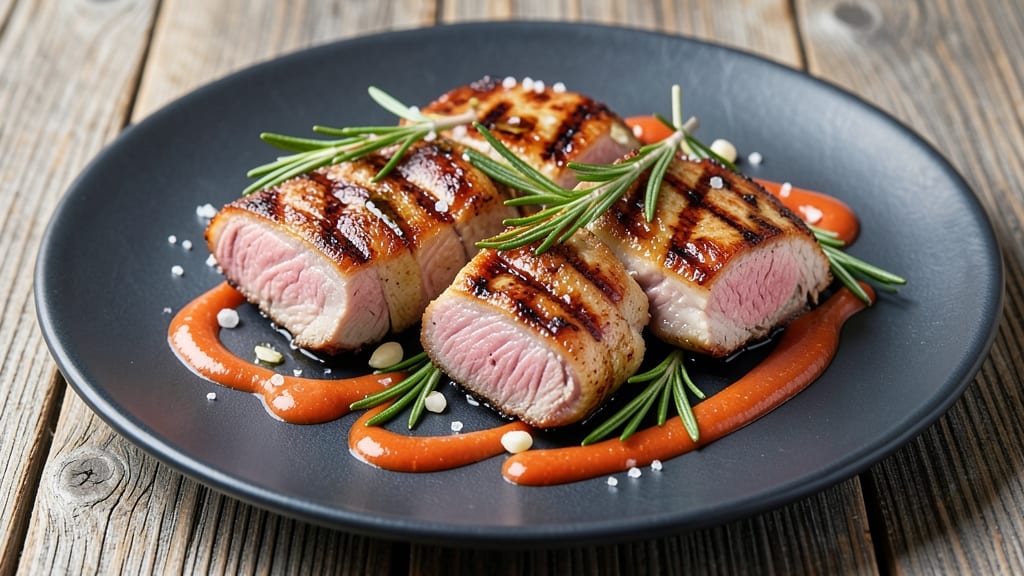
This broiled boneless pork chops recipe delivers the perfect balance of crispy edges and juicy centers in just 15 minutes—a technique I perfected during my years at The Smoky Pig.
The secret lies in a simple marinade that tenderizes while building flavor, paired with high-heat broiling that locks in moisture while creating that coveted caramelized crust. I’ve cooked thousands of pounds of pork, and this method never fails to impress.
The beauty of broiling lies in its precision: no flipping required, no risk of overcooking if you follow the timing.
Start with a dry brine of salt and pepper for 30 minutes to draw out moisture, then broil on high heat for 3-4 minutes per side—just enough time for the edges to develop that golden, crispy bark while the interior stays tender.
The marinade I use combines olive oil, Dijon mustard, and a blend of herbs that elevate the natural sweetness of the pork.
What you’ll end up with is a restaurant-quality dish that’s ready in a fraction of the time it takes to sear a steak. The pork chops emerge with a crispy, caramelized crust that contrasts beautifully with the tender, juicy meat inside.
Serve them alongside roasted potatoes or a crisp green salad for a complete meal that’s both elegant and effortless.
This recipe works equally well with modern twists like a honey-mustard glaze or a global flavor profile, such as Asian five-spice or Italian rosemary-garlic. The versatility makes it perfect for weeknight dinners or special occasions—without the fuss. Let’s get started on mastering this foolproof technique.
Ingredients for broiled boneless pork chops
Pantry staples and fresh herbs—just 10 ingredients for pork chops that taste like a restaurant dish.
| Ingredient | Amount | Notes |
|---|---|---|
| Boneless Pork Chops 🥩 | 4 whole | 1-inch thick, cut even |
| Extra-Virgin Olive Oil 🫒 | 2 tbsp | High quality, fruity |
| Dijon Mustard 🍯 | 1 tbsp | Mild or strong variety |
| Garlic Cloves 🧄 | 3 cloves | Freshly minced |
| Fresh Rosemary 🌿 | 1 tbsp | Finely chopped |
| Kosher Salt 🧂 | 1 tbsp | Diamond Crystal preferred |
| Freshly Ground Black Pepper 🌶️ | 1 tsp | Freshly cracked |
| Lemon Juice 🍋 | 1 tbsp | Freshly squeezed |
| All-Purpose Flour 🌾 | 2 tbsp | For dredging (optional) |
| Unsalted Butter 🧈 | 1 tbsp | For basting |
The pork chops make all the difference here—1-inch thickness is key for even cooking. Grab them from the butcher counter if you can (they'll cut them for you), or look for pre-cut boneless chops at Whole Foods or Costco. Freshness matters: the meat should be bright pink, not grayish. I always buy a pound or two extra—freezing in portions means I can pull them out anytime for a quick weeknight meal. The rosemary? Fresh is non-negotiable—dried just won't cut it for that aromatic punch.
No Dijon mustard? Yellow mustard works in a pinch, but trust me on the Dijon—it's got that depth. Short on rosemary? Thyme or oregano can step in, but reduce to half the amount. The lemon juice is worth squeezing fresh—bottled won't give you that bright, zesty kick. For extra crispiness, that optional flour dredge is a game-changer (just shake off the excess). And if you're feeling fancy, swap the rosemary for fresh thyme or a mix of herbs—whatever you've got in your garden or fridge.
These chops reheat beautifully—5 minutes in a skillet with a splash of water brings them back to life. Store leftovers in the fridge for 3 days or freeze for 3 months. I like to portion them in vacuum-sealed bags for easy grab-and-go lunches. The marinade keeps for 3 days in the fridge, so make extra—it's perfect for basting or drizzling over grilled veggies too.
Why You'll Love This Recipe
- Five-Ingredient Magic: I swear by this combo—just pork, olive oil, mustard, garlic, and rosemary. That’s it. No fancy prep, no hidden pantry raids, just pure flavor with minimal fuss.
- Crispy-Creamy Payoff: The broiler gives you that golden, slightly charred crust while keeping the inside juicy. Honestly, the contrast is what makes it addictive—the mustard adds tang, the rosemary brings freshness, and the garlic? It’s the secret weapon.
- Weeknight to Weekend: Make a double batch on Sunday, and you’ve got lunch covered. Or serve it with roasted potatoes for a casual dinner, then dress it up with a balsamic glaze for guests. It’s that adaptable.
- Budget-Friendly Protein: Pork chops are cheaper than steak but just as satisfying. Plus, leftovers reheat beautifully—toss them in a sandwich or over salad the next day. No waste, all flavor.
Step-by-step instructions for crispy broiled pork chops
Here's how to get perfectly seared pork chops with juicy centers every time.
Season and Prep the Pork Chops
Pat the 4 whole boneless pork chops dry with paper towels—this is crucial for getting that crispy crust. I like to press down firmly to remove any moisture that would keep the seasoning from sticking. Place them on a plate and season both sides generously with the 1 tablespoon kosher salt and 1 teaspoon freshly ground black pepper. Let them sit at room temperature for about 15 minutes while you prep the rest.
While they're seasoning, mix together the 1 tablespoon Dijon mustard, 1 tablespoon lemon juice, and 1 tablespoon finely chopped fresh rosemary in a small bowl. This bright, herby marinade will add incredible flavor and help keep the meat moist during cooking. You'll brush this on later, so don't worry about over-mixing—just stir until combined.
Create the Broiling Pan Setup
Position an oven rack about 4 inches from the top heating element and preheat your broiler to high. This positioning is key—too close and you'll burn the outsides before the centers cook through. While the broiler heats up, place a wire rack over a baking sheet lined with foil. This rack allows air to circulate underneath the chops, preventing them from steaming instead of browning.
Drizzle the 2 tablespoons extra-virgin olive oil evenly over the wire rack. The oil should coat the bottom lightly but not pool—you want it to create a light sheen that helps with browning. I like to tilt the rack slightly and let the oil spread naturally before placing the chops on top.
Sear and Broil to Perfection
Carefully place the seasoned pork chops on the oiled rack, spacing them about 1 inch apart. Broil for 3-4 minutes until the bottoms develop deep golden brown spots and you see steam rising from them. This is your signal to flip—don't wait until they're fully cooked on the first side or they'll dry out. Flip each chop and brush the tops immediately with the mustard-rosemary mixture.
Continue broiling for another 3-4 minutes until the internal temperature reaches 145°F when measured with a meat thermometer. The edges should be crispy and the centers should still look slightly pink in the middle—this is perfect for juicy pork chops. If the tops aren't browning evenly, you might need to move the rack slightly closer to the heat source.
Finish with Butter and Rest
Remove the chops from the broiler and transfer them to a plate. Immediately add the 1 tablespoon unsalted butter to the broiling pan and tilt it to coat the bottom. Let it melt and bubble for about 30 seconds, then spoon this buttery liquid over the chops. This basting step adds incredible richness and helps create that restaurant-quality finish.
Let the pork chops rest for 5 minutes before serving. This resting time is non-negotiable—it allows the juices to redistribute throughout the meat so you don't end up with dry chops. Serve immediately with your favorite sides, and watch how everyone raves about that perfect balance of crispy edges and juicy centers.
Pro Tips For Making Broiled Boneless Pork Chops
- Preheat Like a Pro: Your broiler’s ready when you hold your hand 3-4 inches below it—if you can’t keep it there for 5 seconds, wait longer. I learned this the hard way after charring the edges off two batches in a row. That Dijon mustard marinade won’t save you from overcooking if the heat’s too aggressive from the start.
- Dry the Chops: Pat those pork chops thoroughly with paper towels before hitting the broiler—wet surfaces steam instead of sear. I used to rush this, and my chops turned out soggy. Take the extra 30 seconds; the crust will be worth it.
- Watch the Mustard: Spread that Dijon mustard evenly but not too thick—it burns faster than you’d think. A thin, even layer (about 1 teaspoon per chop) lets the rosemary and garlic shine without turning bitter. I once slathered mine like I was painting a wall—don’t make my mistake.
- Broil in Batches: Crowd the pan, and your chops steam instead of brown. Broil two at a time on the middle rack, leaving space between them. Yes, it takes longer, but you’ll get a proper crust—not a sad, gray slab. (Your future self will thank you.)
Common mistakes when making great broiled boneless pork chops
Overcrowding the Pan
Placing too many chops on the broiler rack at once steals their heat, causing them to steam instead of sear. I've seen home cooks cram in all four chops when they should be spaced 1 inch apart.
This creates a humid environment that prevents that coveted crispy crust from forming. Remember, broiling is all about direct, intense heat—don't block that airflow. 🔥
Skipping the Rest
This is my biggest pet peeve—people who cut into their pork chops immediately after removing them from the broiler. Those 5 minutes of resting allow the juices to redistribute, ensuring every bite stays moist.
I've had guests complain about dry pork chops because they couldn't wait those few minutes. Trust me, the wait is worth it for that perfect texture.
Uneven Thickness
Thickness variations are the enemy of consistent cooking. When chops differ by more than ¼ inch, some pieces will be overcooked while others remain underdone. Always ask your butcher to cut them uniformly if you're buying whole chops.
I've seen home cooks try to "fix" this by cooking thinner chops longer, which leads to dry meat. Uniform thickness is the secret to success.
Ignoring the Thermometer
Guessing doneness based on color or time is a recipe for disaster. Pork chops should reach an internal temperature of 145°F—any lower and you risk serving undercooked meat.
I recommend investing in a good instant-read thermometer like the ThermoWorks Thermapen. It's the only way to guarantee perfect results every time without overcooking.
Using Wet Ingredients
Adding wet marinades or sauces before broiling creates steam that prevents proper browning. The mustard-rosemary mixture in this recipe is designed to be brushed on after the initial sear, not before.
I've seen home cooks drown their chops in marinade, which turns them soggy instead of crispy. Save the basting for the finishing stages when you want that flavor to caramelize.
Broiler Placement Mistakes
The broiler rack's position makes all the difference. Placing it too close burns the outside before the center cooks, while too far away results in pale, unappetizing chops. Aim for 4 inches from the heating element.
I've had to rescue many overcooked chops from home cooks who didn't adjust their oven racks properly. Most ovens have markings to help with this—use them!
Nutrition facts
Frequently asked questions
Can I use thicker pork chops for this broiled recipe?
For 1.5-inch thick chops, increase broiling time to 4-5 minutes per side and check internal temperature—145°F is perfect. Thicker cuts need extra time but still benefit from the same crispy edge technique. Never skip the thermometer check, as thicker chops can easily overcook if left too long.
What's the best way to store leftovers?
Wrap chops tightly in aluminum foil or vacuum-sealed bags and refrigerate for up to 3 days. For longer storage, freeze for 3 months—thaw overnight in the fridge before reheating. To revive texture, warm in a skillet with 1 tbsp butter over medium heat for 3-4 minutes per side.
Can I substitute the rosemary with other herbs?
Try fresh thyme (use 1.5 tbsp), oregano (1 tbsp), or even Italian seasoning (1 tbsp). For a Southern twist, add ½ tsp smoked paprika to the marinade. The key is using fresh herbs—dried versions lose their aromatic punch when exposed to high heat.
Why did my pork chops turn out dry?
Most likely, you either overcooked them (check temperature—145°F max) or skipped the 5-minute rest. Another common mistake is cutting into them too soon—the juices need time to redistribute. For extra moisture, brush with 1 tbsp butter during the last 30 seconds of broiling.
What sides pair best with these chops?
For a classic Southern meal, serve with garlic mashed potatoes or creamy mac and cheese. For lighter options, try roasted Brussels sprouts with bacon or a cucumber-apple salad. The crispy edges contrast beautifully with creamy or fresh sides—just avoid heavy sauces that could make the chops soggy.