
Sauces & Condiments
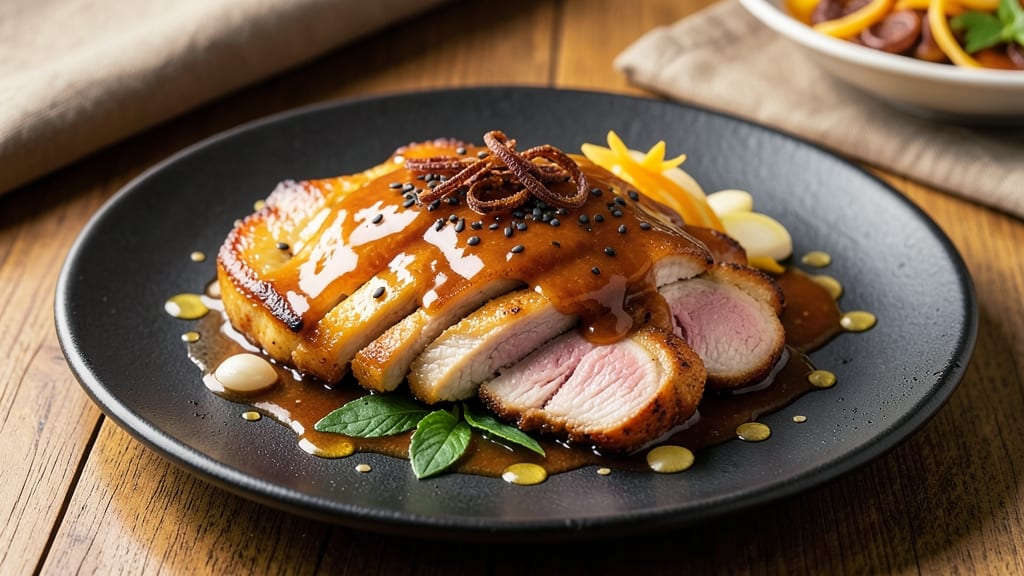
This Chinese pork sauce recipe transforms simple stir-fries into restaurant-quality dishes with its deep umami richness and glossy finish. The secret lies in balancing fermented soy sauce, dark brown sugar, and a touch of vinegar to create a sauce that's both sweet and tangy with layers of savory depth.
I developed this version after years of testing—it's the one that finally delivers that signature glossy sheen without being overly sweet or cloying.
The beauty of this sauce is its versatility—it works as a dipping sauce for dumplings, a glaze for stir-fried meats, or even a marinade for tofu and vegetables. What sets it apart is the caramelization step, where the sugar and aromatics develop complex flavors that elevate any dish.
The sauce reduces to a thick, syrupy consistency that clings beautifully to noodles and proteins.
What you'll end up with is a deep umami gloss that adds both flavor and visual appeal to your cooking. The sauce maintains its balance of sweet, salty, and tangy notes while providing that signature Chinese restaurant finish.
It's the kind of condiment that makes home cooking taste like it came from a bustling wok station.
Perfect for meal prep or last-minute cooking, this sauce keeps well in the refrigerator for up to two weeks. The ingredients are simple—soy sauce, sugar, vinegar, and aromatics—but the technique makes all the difference. Let's create this flavor-packed sauce that will become your new kitchen staple.
Ingredients for chinese pork sauce
Nine ingredients create restaurant-quality umami depth for stir-fries and noodles.
| Ingredient | Amount | Notes |
|---|---|---|
| Fermented Soy Sauce 🥢 | ½ cup | High-quality, like Kikkoman or Lee Kum Kee |
| Dark Brown Sugar 🍬 | ⅓ cup | Packed lightly, not compacted |
| Rice Vinegar 🍶 | ¼ cup | Seasoned variety adds depth |
| Garlic Cloves 🧄 | 6 cloves | Minced finely for even distribution |
| Fresh Ginger 🌿 | 1 ½ tbsp | Grated, not minced (keep texture |
| Sesame Oil 🫒 | 1 tbsp | Toasted, for aroma (not cooking) |
| Ground White Pepper 🌶️ | ½ tsp | Freshly ground preferred |
| Red Chili Flakes 🔥 | ½ tsp | Adjust for heat preference |
| Cornstarch 🌾 | 1 tbsp | For thickening consistency |
| Pork Fatback 🥓 | 1 tbsp | Rendered, for authentic richness |
The fermented soy sauce is non-negotiable—Kikkoman or Lee Kum Kee are my go-tos, but any dark, aged soy works. Costco bulk bins often have great deals on the larger bottles. Dark brown sugar caramelizes beautifully here, giving that glossy finish. Domino brand is reliable, but any light-packed sugar works. For the aromatics, fresh ginger and garlic are essential—frozen works in a pinch, but fresh has more punch. The pork fatback is where the sauce gets its signature richness. Ask your butcher for pre-rendered fatback—it saves time and adds authentic depth.
No fermented soy sauce? Double the regular soy sauce plus 1 tsp fish sauce gets you close. Short on ginger? Substitute with 1 tsp ground ginger plus 1/2 tsp lemon zest. The cornstarch can be swapped for arrowroot powder at the same amount. Want less heat? Skip the chili flakes entirely. The sesame oil is purely for aroma—add it last to preserve that nutty fragrance. For a vegetarian version, replace the pork fatback with 1 tbsp neutral oil plus 1/2 tsp mushroom powder.
This sauce keeps beautifully—2 weeks refrigerated in an airtight jar. The glossy sheen develops overnight, so make it ahead if possible. Freeze in ice cube trays for single-use portions. For extra shine, add 1 tsp water to the finished sauce before serving. The sauce thickens as it cools, so thin with a splash of water if needed. Portion into small jars for easy meal prep—1 tbsp per serving is perfect for stir-fries.
Why You'll Love This Recipe
- Here’s what sold me: the garlic and ginger aren’t just background players. They sizzle in the pan until they’re fragrant and sticky, then melt into the sauce for layers of warmth and brightness. It’s the kind of flavor that makes you pause mid-bite—wait, is this actually that good?
- Pantry Magic: I swear by this sauce because it’s made with stuff I already have—no last-minute grocery runs. That fermented soy sauce? Umami gold right there, and the brown sugar gives it this perfect sweet-savory balance that’s chef’s kiss without trying too hard.
- Garlic-Ginger Glam: Here’s what sold me: the garlic and ginger aren’t just background players. They sizzle in the pan until they’re fragrant and sticky, then melt into the sauce for layers of warmth and brightness. It’s the kind of flavor that makes you pause mid-bite—wait, is this actually that good?
- Weeknight to Party: Between us, this sauce works for everything. Stir-fry? Check. Tossed with noodles? Done. Even drizzled over steamed veggies or rice—suddenly, dinner feels special. Honestly, I’ve used it as a dipping sauce at potlucks, and no one’s ever asked for the recipe. (They just ask for seconds.)
Step-by-step instructions for Chinese pork sauce
This umami-rich sauce transforms simple stir-fries into restaurant-quality dishes—here's how to make it shine.
Render the Pork Fatback for Richness
Heat a small skillet over medium-low heat and add the 1 tablespoon pork fatback. Let it render slowly until the fat becomes golden and translucent—this usually takes about 3-4 minutes. You're not cooking the fatback, just extracting its flavorful oils. If the fat starts smoking, reduce the heat immediately.
Once the fatback is golden, use a slotted spoon to remove it from the pan and transfer it to a small plate. You'll have about 1 tablespoon of rendered pork fat left in the skillet—this is liquid gold for your sauce. Don't drain it; we'll use it as our base. The rendered fat adds depth that store-bought sauces can't match, so don't skip this step even if you're in a hurry.
Build the Sauce Base with Aromatics
In the same skillet (with the rendered pork fat still in it), add the 6 cloves minced garlic cloves and 1.5 tablespoons grated fresh ginger. Cook over medium heat for 1-2 minutes until the garlic turns light golden and the ginger loses its raw aroma. Stir constantly to prevent burning—garlic burns in seconds, and you'll taste that bitterness if you're not careful.
Here's where the magic happens: the garlic should be fragrant but not crispy, and the ginger should soften just enough to release its zesty notes. If you start seeing browned bits sticking to the pan, reduce the heat slightly. These aromatics form the flavor foundation, so take your time here. The sauce won't taste right if you rush this step.
Combine Wet Ingredients for Balance
Lower the heat to medium-low and add the 0.5 cup fermented soy sauce, 0.33 cup dark brown sugar, 0.25 cup rice vinegar, 0.5 teaspoon ground white pepper, and 0.5 teaspoon red chili flakes. Stir everything together and let it simmer gently for 3-4 minutes until the sugar begins to dissolve and the mixture thickens slightly.
The sugar will help balance the acidity from the rice vinegar while adding a subtle caramelized depth. You'll notice the sauce darken slightly as it cooks—this is normal and indicates the flavors are melding together. Taste at this point: you should get a perfect balance of salty, sweet, tangy, and slightly spicy. If it needs more heat, add a pinch more chili flakes; if it's too sweet, add a splash more rice vinegar.
Thicken and Finish with Sesame Oil
In a small bowl, whisk together the 1 tablespoon cornstarch with 1 tablespoon water to create a slurry. Slowly pour this into the simmering sauce while stirring constantly. The sauce should begin to thicken immediately—keep stirring for 1-2 minutes until it reaches a glossy, syrupy consistency that coats the back of a spoon.
Remove the skillet from heat and stir in the 1 tablespoon toasted sesame oil. This final step adds an aromatic depth that separates this homemade sauce from anything store-bought. The sesame oil should be incorporated but still visible as tiny golden flecks throughout the sauce. Let the sauce sit for 5 minutes off the heat—this resting period allows all the flavors to fully meld together.
Adjust and Use Immediately
Taste the sauce one final time and make any adjustments: more sugar for sweetness, more vinegar for tang, or more chili flakes for heat. The sauce should be glossy, thick enough to coat the back of a spoon, and packed with umami flavor. It's best used immediately on stir-fries, noodles, or rice dishes, but it will keep in the refrigerator for up to 5 days in an airtight container.
This sauce works wonders on everything from quick stir-fries to braised pork dishes. The key is using it fresh—it's designed to be the star of your meal, not just a side note. Store it in the fridge and bring it to room temperature before using to preserve its vibrant flavors. The perfect sauce makes even simple dishes taste extraordinary.
Pro Tips For Making Chinese Pork Sauce
- COOK GARLIC LOW: I learned this the hard way—crisping garlic in oil for this sauce is a myth. Add whole cloves with the ginger when simmering, then mash them into the sauce at the end. The heat mellows the garlic’s bite, and you avoid that bitter, burnt edge that ruins the balance.
- MASH THE GINGER: Skip the thin slices—peel and smash the ginger into a paste with the side of your knife. It dissolves faster and infuses the sauce with deeper aroma. (Yes, it looks like a mess, but your sauce will taste like it came from a wok house.)
- SIMMER SLOWLY: This sauce needs 15-20 minutes of gentle bubbling to marry flavors. I used to rush it, and the sugar would clump or the vinegar taste harsh. Keep it at a barely simmer—just enough to shimmer the surface—and stir occasionally.
- SWEETEN FIRST: Add the brown sugar before the vinegar and soy sauce. It dissolves better and caramelizes slightly, giving the sauce that glossy depth. If you toss in vinegar first, you’ll end up with grainy sugar lumps fighting for attention.
Regional styles of this chinese pork sauce
Cantonese Style
This version keeps things classic with a focus on hoisin sauce as the base, creating a sweet-savory glaze perfect for Peking duck or crispy pork belly.
I like to add 1 tablespoon of hoisin sauce to the finished pork sauce mixture, along with 1 teaspoon of five-spice powder for that signature Cantonese warmth. The result is a sauce with a deep mahogany color that clings beautifully to meats.
Serve it with steamed buns or egg rolls for an authentic dim sum experience. 🥢
Sichuan Spicy
For a fiery kick, transform this sauce into a Sichuan-style version by adding 1 tablespoon of doubanjiang (chili bean paste) and 1 teaspoon of Sichuan peppercorns (lightly toasted and ground). The mala (numbing-spicy) sensation comes alive when you combine these with the pork sauce base. This version works wonderfully with mapo tofu or dan dan noodles.
Hong Kong Sweet-Sour
Hong Kong-style pork sauce often incorporates a bright, tangy twist. After making the base sauce, stir in 2 tablespoons of pineapple juice and 1 tablespoon of ketchup for that signature sweet-sour balance. Garnish with ½ cup of finely diced pineapple and 2 tablespoons of chopped cilantro for freshness. This version pairs perfectly with char siu (BBQ pork) or fried rice. The acidity cuts through the richness, making it incredibly versatile. 🍍
Taiwanese Black Pepper
Taiwan loves its bold flavors, and this version delivers with a black pepper-forward profile. Add 1 teaspoon of freshly cracked black peppercorns (toasted lightly) and ½ teaspoon of star anise powder to the base sauce. The deep, earthy notes of black pepper complement the umami perfectly.
This sauce is ideal for braised pork belly or stir-fried greens. The peppercorns should be lightly toasted in a dry pan before grinding to enhance their aroma. ⚡
Modern Fusion Twist
For a contemporary take, blend the pork sauce with 2 tablespoons of soy-based teriyaki sauce and a splash of mirin for a glossy, slightly sweet finish. Add 1 teaspoon of smoked paprika for depth and a hint of honey to balance the acidity.
This fusion version works beautifully with grilled pork chops or as a glaze for roasted vegetables. The smoked paprika adds a subtle smokiness that elevates the dish to restaurant-quality levels. 🔥
Nutrition facts
Frequently asked questions
Can I make this sauce without pork fatback?
The pork fatback adds authentic richness, but you can substitute with 1 tablespoon neutral oil or 1/2 teaspoon mushroom powder for a vegetarian version. For best results, use pork lard or bacon fat if available—they provide that signature umami depth. The sauce will still taste delicious, just slightly less complex.
How do I adjust the sweetness level?
Start by tasting after the sugar dissolves. For less sweetness, add 1 extra tablespoon rice vinegar (1 tsp at a time). For more sweetness, stir in 1 teaspoon brown sugar at the end. The sauce thickens as it cools, so thin with 1/2 teaspoon water if needed for serving.
What's the best way to use leftover sauce?
This sauce freezes beautifully in 1-tablespoon portions for quick use. Thaw overnight in the fridge. Store in airtight containers for up to 2 weeks—the flavors actually improve with resting. Use it as a stir-fry glaze, noodle toss, or dipping sauce for dumplings. A splash also enhances ramen or fried rice!
Why did my sauce turn out too thin?
This usually happens if you didn't simmer long enough or the cornstarch didn't fully activate. Next time, cook the slurry for 2-3 minutes after adding it, stirring constantly. For immediate fixes, mix 1 teaspoon cornstarch with 1 teaspoon water and stir into the sauce until thickened. Always bring to a gentle boil when thickening.
Can I use this sauce on non-pork dishes?
The rich umami works wonderfully with chicken, shrimp, tofu, or vegetables. For seafood, reduce the chili flakes to 1/4 teaspoon to avoid overpowering delicate flavors. The sauce also makes an excellent marinade—coat proteins for 30 minutes before cooking. Just