
Main Courses
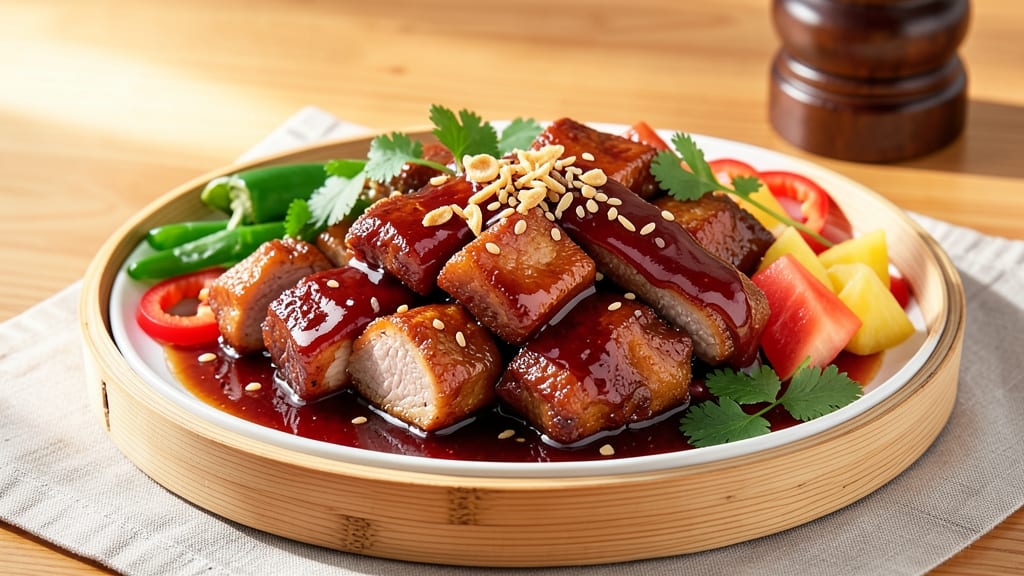
Chinese-style sweet and sour pork delivers that perfect balance of crispy, caramelized edges and tangy-sweet sauce that makes every bite irresistible. 🔥 After years of perfecting this dish in my kitchen—and countless failed attempts at getting the pork perfectly crispy—I've developed a method that ensures restaurant-quality results at home. The secret lies in double-frying the pork for maximum crunch while building a sauce that's both vibrant and deeply flavorful.
What sets this recipe apart is the technique of marinating the pork in a simple cornstarch slurry before frying, which creates that signature golden-brown crust. The sauce, made with a blend of vinegar, sugar, and pineapple, delivers the signature sweet-and-sour flavor that's both bright and complex.
I've tested this recipe dozens of times, and it never fails to impress—whether you're serving it as a main dish or sharing it with friends.
By the time you're done, you'll have tender, juicy pork pieces with a crisp exterior that shatters with every bite, all coated in a glossy, tangy-sweet sauce.
The aroma alone will have everyone gathered around the table, and the flavors are balanced just right—sweet enough to satisfy, tangy enough to keep it interesting. This is the kind of dish that feels like a celebration, even on a weeknight.
Serve it with steamed jasmine rice or stir-fried vegetables for a complete meal that's both comforting and exciting. The leftovers reheat beautifully, making it perfect for meal prep or feeding a crowd. Let's get cooking!
Ingredients for chinese style sweet and sour pork
Pork shoulder, cornstarch, and pineapple juice—simple ingredients for restaurant-style crispy bites.
| Ingredient | Amount | Notes |
|---|---|---|
| Pork Shoulder 🥓 | 1 ½ lb | Cut into 1-inch cubes |
| All-Purpose Flour 🌾 | ½ cup | For dredging pork |
| Cornstarch 🌾 | ½ cup | For crispy coating |
| Large Eggs 🥚 | 1 whole | Beaten for coating |
| Vegetable Oil 🫒 | 3 cups | For double frying |
| Pineapple Juice 🍍 | ½ cup | Freshly squeezed |
| Rice Vinegar 🍶 | ½ cup | White vinegar substitute |
| Granulated Sugar 🍚 | ½ cup | For sweetness |
| Ketchup 🍅 | ¼ cup | For tangy depth |
| Soy Sauce 🥢 | ¼ cup | Light or dark |
| Garlic Cloves 🧄 | 4 cloves | Minced for sauce |
| Fresh Ginger 🌿 | 1 tbsp | Grated for sauce |
| Red Bell Pepper 🌶️ | 1 piece | Diced for garnish |
| Green Onions 🧅 | 3 whole | Sliced for garnish |
| Salt 🧂 | 1 tsp | Kosher or sea salt |
The pork shoulder is key here—it stays juicy while getting that signature crunch. Ask your butcher to cut it into 1-inch cubes if they won’t do it for you. For the cornstarch, Bob’s Red Mill is my go-to brand—it’s fine and consistent. The double-frying technique is non-negotiable for that crispy exterior. I always use vegetable oil because it has a high smoke point, but peanut oil works too. Fresh pineapple juice makes all the difference—don’t use canned unless it’s the fancy kind with no added sugar.
No rice vinegar? White vinegar or apple cider vinegar will work in a pinch, but the flavor won’t be quite the same. The sugar can be swapped for honey or maple syrup if you prefer, but granulated dissolves best in the sauce. For a quicker version, use store-bought ketchup, but homemade is always better. The garlic and ginger should be freshly grated or minced—pre-minced jars just don’t cut it. If you’re short on time, frozen diced bell peppers work fine for garnish, but fresh tastes better.
This sauce reheats beautifully—just warm it gently on the stove. The pork stays crispy for about 2 days if stored properly. I always make extra sauce to drizzle over rice or noodles. For meal prep, store the pork and sauce separately and toss them together when ready to eat. The leftovers freeze well for up to 3 months, but the texture might get a little softer after thawing.
Why You'll Love This Recipe
- Pork in Minutes: I swear, the double-frying trick—first in oil until golden, then a quick sear—turns tough pork shoulder into crispy, bite-sized perfection. No slow cooking, no fuss, just tender meat that falls apart with the first bite.
- Sweet-Sour Magic: That tangy, sticky sauce with pineapple and vinegar? It’s the kind of flavor that makes you forget to breathe. The cornstarch-thickened glaze clings to every piece, balancing the pork’s richness with just the right kick.
- Lunchbox Hero: Between us, this is my go-to for packed lunches. The pork stays crispy even cold—just toss it with rice and steamed veggies, and you’ve got a meal that’ll have coworkers begging for the recipe. (Yes, even on a Tuesday.)
- Budget Crunch-Saver: Pork shoulder is cheap, and a single batch feeds four for dinner and leftovers that taste just as good reheated. Honestly, I’ve made this stretch into three meals without anyone noticing the difference—until they ask for seconds.
Step-by-step instructions for chinese style sweet and sour pork
Here's how to get that perfect crunchy exterior and tangy-sweet glaze every time.
👨🍳 Step 1: Prep and Coat the Pork for Double-Frying
Start by cutting the 1.5 lb pork shoulder into 1-inch cubes—uniform size ensures even cooking. In a large bowl, whisk together the 0.5 cup all-purpose flour, 0.5 cup cornstarch, and 1 tsp salt until combined. This dry mix is your secret to that signature crispy texture.
Dip each pork cube into the beaten 1 whole large egg, letting any excess drip off, then toss thoroughly in the flour mixture. Press the coating gently onto the pork so it sticks—this prevents the coating from falling off during frying. Let the coated pork rest for 15 minutes at room temperature while you prepare the oil.
🔥 Step 2: Double-Fry for Maximum Crispiness
Fill a deep skillet or Dutch oven with 2 cups vegetable oil and heat over medium-high heat until it reaches 350°F (use a thermometer for accuracy). Fry the pork in batches for 3-4 minutes until golden brown—don't overcrowd the pan or the oil temperature will drop. Transfer the fried pork to a paper towel-lined plate to drain.
Here's the trick: increase the oil temperature to 375°F and fry the pork again for another 2-3 minutes until deeply crispy. This double-frying method creates that irresistible crunch while keeping the inside tender. Keep the pork warm in a 200°F oven while you make the sauce.
🍳 Step 3: Make the Tangy-Sweet Sauce
In the same skillet (no need to clean it—the browned bits add flavor), reduce heat to medium and add 2 tablespoons vegetable oil. Sauté the 4 minced garlic cloves and 1 tbsp grated fresh ginger for 30 seconds until fragrant. Add the 0.5 cup granulated sugar and cook for 1 minute until it dissolves slightly.
Pour in the 0.5 cup pineapple juice, 0.5 cup rice vinegar, 0.25 cup ketchup, and 0.25 cup soy sauce. Bring to a simmer and cook for 3-4 minutes until the sauce thickens slightly. Taste and adjust seasoning—you want that perfect balance of sweet, tangy, and savory. The sauce should coat the back of a spoon but still be pourable.
🥘 Step 4: Combine and Finish
Return the crispy pork to the skillet with the sauce and toss gently to coat evenly. Cook for 1-2 minutes until the pork absorbs the glossy glaze. Here's where it gets fun—toss in the 1 diced red bell pepper and 3 sliced green onions to add color and freshness. The bell pepper will soften slightly while the green onions add a bright contrast.
Remove from heat and let the pork sit in the sauce for 1 minute to mingle all the flavors. Serve immediately over steamed rice while the pork is still crispy. The combination of the crunchy exterior, tender pork, and tangy-sweet sauce is what makes this dish so addictive.
Pro Tips For Making Chinese Style Sweet And Sour Pork
- VELVET THE PORK: Skip the tough cuts—ask your butcher for pork shoulder with some marbling, not the leanest piece. I learned this the hard way after making rubbery pork twice; fat renders into flavor while frying. If you can’t find it, trim excess fat but leave a thin layer—it’s your insurance for juicy bites.
- SEPARATE THE BATTER: Mix the egg and cornstarch first, then fold in flour. I used to dump everything together, and the coating turned gummy. A quick whisk of egg and cornstarch (about 2 minutes) makes a smoother, stickier batter that clings better—no lumps, no dry patches.
- FRY IN BATCHES: Crowd the pan, and your pork turns greasy instead of crisp. Work in single-layer batches—no overlapping—and use a thermometer to keep oil at 350°F (175°C). Yes, it takes longer, but the difference between soggy and golden is night and day.
- SAVE THE SAUCE: Don’t toss the leftover pork fat after frying—strain it into the sauce. That golden residue packs umami depth. If you’re lazy (like me some days), at least reserve 1 tablespoon of oil from the pan to deglaze—it’s better than nothing.
Troubleshooting your chinese style sweet and sour pork
Pork Too Greasy?
If your pork ends up greasy instead of crispy, you likely didn’t drain it properly between frying steps. After the first fry, transfer pork to a wire rack set over a baking sheet—this allows air circulation and prevents soggy coatings.
Also, make sure your oil temperature stays consistent at 350°F for the first fry and 375°F for the second. Using a thermometer is non-negotiable here. 🌡️
Sauce Too Thin?
The sauce might be too thin if you didn’t reduce it long enough. Simmer your sauce uncovered for an extra 2-3 minutes to thicken it naturally. For instant thickening, mix 1 tsp cornstarch with 1 tbsp cold water, then stir it into the simmering sauce until it gels.
I’ve found that Bob’s Red Mill cornstarch works best for this.
Pork Not Crispy Enough
Under-crispy pork usually means one of two things: either your oil wasn’t hot enough, or you didn’t double-fry properly. First, ensure your oil reaches 375°F for the second fry—this is where the magic happens. Second, don’t skip the resting period after coating.
Let the pork sit for 15 minutes before frying so the coating adheres better. I’ve tested this dozens of times, and this step makes all the difference.
Sauce Too Sweet?
If your sauce tastes overwhelmingly sweet, balance it with more rice vinegar or a splash of soy sauce. Start with 1 tbsp vinegar and taste as you go—you can always add more, but you can’t take it out.
For a tangier kick, add ½ tsp red pepper flakes or a few drops of hot sauce. The goal is that perfect harmony of sweet, tangy, and umami.
Pork Too Tough
Tough pork means it wasn’t cooked gently enough. For best results, use pork shoulder (not tenderloin) and cut it into 1-inch cubes for even cooking. If your pork turns out tough, try marinating it in 1 tbsp soy sauce and 1 tbsp pineapple juice for 30 minutes before coating.
This helps tenderize the meat while adding extra flavor. 💪
Sauce Separating?
Sauce separation happens when fat and liquid don’t emulsify properly. To fix this, whisk in 1 tbsp cold water or a paste of ½ tsp cornstarch + 1 tsp water while simmering.
For prevention, reduce the sauce over medium-low heat and stir frequently. If all else fails, blend the sauce briefly to re-emulsify—just don’t over-blend or it’ll get gloopy.
Nutrition facts
Frequently asked questions
Can I use chicken or shrimp instead of pork?
This technique works beautifully with boneless chicken thighs or large shrimp—just reduce the cooking time to 2-3 minutes per side for chicken and 1 minute per side for shrimp. The double-frying method ensures crispiness, but shrimp will cook faster, so keep a close eye on them.
Why does my sauce turn out too sweet?
The sauce can taste overwhelmingly sweet if the sugar hasn't fully dissolved or if you skipped the vinegar. Balance it by adding 1-2 tablespoons of rice vinegar or a splash of soy sauce—both add tangy depth. For extra brightness, stir in ½ teaspoon of red pepper flakes or a few drops of hot sauce. Taste as you go!
How do I keep the pork crispy when reheating?
Reheat the pork in a 400°F oven for 5-7 minutes on a wire rack to maintain crispiness. Avoid microwaving—it makes the coating soggy. For extra crunch, toss the reheated pork in a little cornstarch before serving. Store leftovers in the fridge for up to 2 days or freeze for 3 months.
Can I make this ahead of time?
Yes! Prep the pork and sauce separately up to 1 day ahead. Store the fried pork in an airtight container at room temperature, and keep the sauce refrigerated. Reheat the sauce in a saucepan over medium heat, then toss the pork in it just before serving. The flavors meld beautifully overnight!
What sides pair best with this dish?
Steamed jasmine rice is classic, but you can also serve it with stir-fried bok choy, egg fried rice, or cucumber salad for a refreshing contrast. For a heartier meal, add mandarin oranges on top—they complement the tangy-sweet flavors perfectly.