
Main Courses
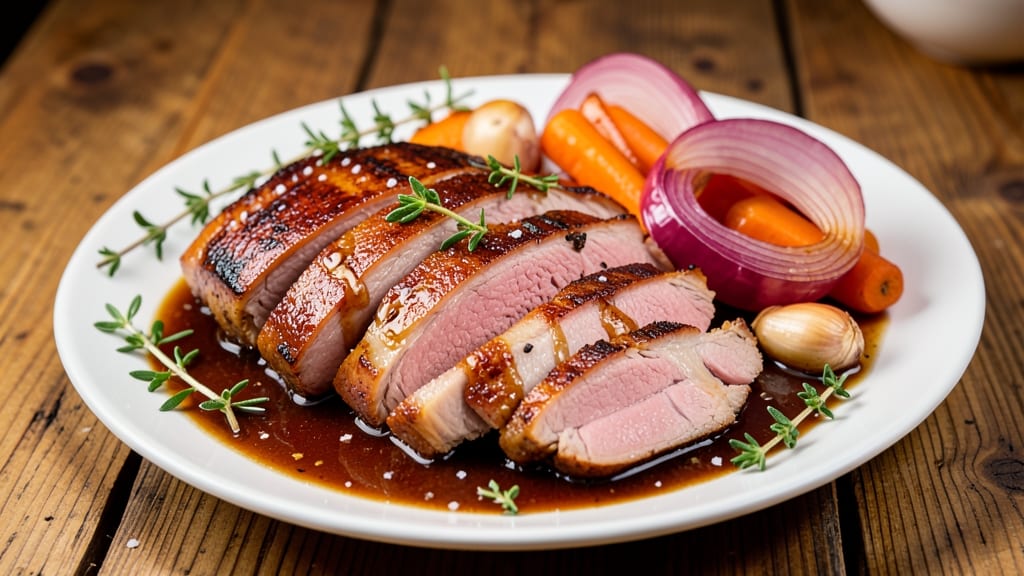
This cider-braised pork roast transforms tough cuts into melt-in-your-mouth perfection through slow cooking and apple cider's magic. 🌟 The secret lies in the cider's acidity tenderizing the meat while creating a rich, caramelized fondue that coats every bite.
As someone who's cooked thousands of pounds of pork, I can tell you this method delivers restaurant-quality results at home with minimal effort.
The process begins with searing the pork to lock in juices, then braising it in a flavorful liquid of apple cider, aromatics, and herbs. The cider doesn't just flavor the meat—it breaks down collagen for extraordinary tenderness while developing deep, complex notes as it reduces.
What starts as a simple roast becomes a luxurious centerpiece that pairs beautifully with classic sides like mashed potatoes or roasted root vegetables.
By the time you're ready to serve, you'll have perfectly tender pork that falls apart with just a fork, swimming in a glossy, caramelized cider sauce. The aroma alone will have everyone gathering at the table, and each bite delivers that perfect balance of sweet, tangy, and savory flavors.
This is comfort food elevated to something special—exactly what makes Sunday dinners memorable.
The best part? This technique works equally well for holiday feasts or casual weeknight dinners. The braising method means you can walk away while the magic happens, leaving you with time to enjoy the meal rather than stress over cooking.
Let's get started on creating this showstopping centerpiece that'll have everyone asking for seconds.
Ingredients for cider braised pork roast
Six aromatic ingredients transform tough pork into fall-apart perfection with apple cider's magic.
| Ingredient | Amount | Notes |
|---|---|---|
| Pork Shoulder Roast 🍖 | 4 lb | Bone-in for best flavor |
| Apple Cider 🍎 | 2 ½ cups | Unfiltered for best flavor |
| Yellow Onion 🧅 | 1 whole | Chopped into wedges |
| Carrots 🥕 | 4 whole | Cut into chunks |
| Garlic Cloves 🧄 | 6 cloves | Smashed for aroma |
| Fresh Thyme 🌿 | ¼ cup | Stems removed, chopped |
| Fresh Rosemary 🌿 | ¼ cup | Needles chopped fine |
| Olive Oil 🫒 | 2 tbsp | Extra-virgin preferred |
| Kosher Salt 🧂 | 1 ½ tsp | Diamond Crystal preferred |
| Black Peppercorns 🌶️ | 1 tsp | Freshly cracked |
| Bay Leaves 🍃 | 2 whole | Dried preferred |
| Brown Sugar 🍚 | 2 tbsp | Light or dark |
The pork shoulder is the star here—bone-in cuts stay juicier and develop deeper flavor. Costco or local butcher shops often have great deals on pork shoulder, but the regular supermarket variety works too. Look for good marbling and avoid anything with grayish edges. The apple cider makes all the difference—Mott's or Woodchuck are reliable brands, but any unfiltered cider will do. Fresh herbs are ideal, but if you're short on time, dried thyme and rosemary at half the amount will work in a pinch. Just make sure to remove the stems from fresh herbs before chopping.
No fresh thyme or rosemary? Dried works at half the quantity—just crush the leaves between your fingers to release the oils. Running low on apple cider? Substitute with apple juice plus 1 tbsp apple cider vinegar for that same tangy depth. The brown sugar adds subtle sweetness to balance the cider's acidity, but you can skip it if you prefer a more tart flavor. For the onions and carrots, don't worry about perfect uniformity—just rough chop them so they cook evenly. The bay leaves add earthy depth, but if you forget them, a pinch of ground allspice can mimic the flavor.
This roast tastes even better the next day, so plan ahead. Store leftovers in the fridge for up to 5 days or freeze for 3 months. The sauce thickens as it cools, so you can always add a splash of water or cider to loosen it up when reheating. I like to portion the leftovers into individual containers so I can grab a meal for lunch all week. The pork stays moist when reheated gently in the sauce—just warm it on the stove over low heat, covered, for about 10 minutes.
Why You'll Love This Recipe
- One-Pan Magic: I swear by this—just dump everything into a Dutch oven, walk away, and let the cider do the work. No flipping, no fussing, just that rich, sticky pork melting into tender perfection while the onions caramelize right alongside.
- Sweet-Savory Bomb: That first bite? The pork shoulder falls apart at the touch of a fork, drenched in a sauce that’s tangy from the cider, deep from the garlic, and just sweet enough from the onions and carrots simmering down. It’s the kind of flavor that makes you pause mid-bite.
- Leftovers That Shine: Between us, this roast is better the next day. The pork gets even more tender, and the cider sauce thickens into something almost glaze-like—perfect for sandwiches, tacos, or just reheating with a splash of broth. I make it on Sundays just for this.
- Budget Hero: Pork shoulder is cheap, cider’s a pantry staple, and you’re using whole vegetables—not scraps. A single roast feeds my family of four for three meals, and I still have change left for a nice bottle of wine. (Yes, even on a Tuesday night.)
Step-by-step instructions for cider-braised pork roast
This method transforms tough pork shoulder into melt-in-your-mouth perfection with rich cider fondue.
🔥 Step 1: Sear the Pork Shoulder to Lock in Juices
Heat a large Dutch oven over medium-high heat until very hot. Add the 2 tablespoons olive oil and swirl to coat the bottom. Pat the 4 lb pork shoulder roast completely dry with paper towels—this ensures maximum browning.
Place the pork shoulder fat-side down in the pan and sear undisturbed for 8-10 minutes until the fat renders and the skin develops a deep golden-brown crust. You'll see the fat bubbling and sizzling—this is your signal to flip. Then sear the other side for another 6-8 minutes until evenly browned. Remove the pork and set it aside on a plate.
Here's the thing—searing creates a flavorful crust that prevents juices from escaping during braising. If it sticks, don't panic—just let it cook longer. The meat will release when it's ready.
👨🍳 Step 2: Build the Aromatic Cider Base
In the same Dutch oven, add the chopped yellow onion wedges and cook for 3-4 minutes until softened and just beginning to color. Add the carrot chunks and cook for another 2 minutes while stirring occasionally.
Push the vegetables to the sides of the pan and add the 6 smashed garlic cloves along with the 2 tablespoons brown sugar. Stir for 30 seconds until fragrant—you should smell sweet caramelization developing. This is where the magic happens: the sugar helps deepen the cider's flavor.
Sprinkle the 1.5 teaspoons kosher salt and 1 teaspoon freshly cracked black peppercorns over everything, then add the 2 whole bay leaves and 0.25 cup chopped fresh thyme and 0.25 cup chopped fresh rosemary. Stir everything together to combine the spices with the caramelized bottom of the pan.
🥘 Step 3: Deglaze and Braise with Apple Cider
Pour in the 2.5 cups apple cider slowly, scraping up all the browned bits from the bottom of the pan with a wooden spoon. This deglazing step captures all the flavor you've built so far. Bring the mixture to a gentle simmer over medium heat for 5 minutes until slightly reduced.
Return the pork shoulder to the Dutch oven, fat-side up, along with any accumulated juices from the plate. The liquid should come about halfway up the sides of the pork. If it doesn't, add a splash of water or cider to help create steam during braising.
Cover the Dutch oven tightly with a lid and transfer it to a preheated 300°F oven. Here's where patience pays off—braise for 3-3.5 hours until the pork is fork-tender. The internal temperature should reach 200-205°F when measured in the thickest part of the meat.
⏰ Step 4: Rest and Shred for Perfect Texture
Once the pork reaches the right temperature, remove it from the oven and let it rest in the braising liquid for 30 minutes. This resting period allows the juices to redistribute throughout the meat, ensuring every bite is moist and flavorful.
After resting, transfer the pork to a cutting board and shred it using two forks. The meat should pull apart easily with minimal effort—if it's still tough, return it to the pot with the braising liquid and cook for another 15-20 minutes covered.
Taste the braising liquid and adjust seasoning if needed. You can serve the shredded pork directly from the Dutch oven, spooning the rich cider fondue over the top, or transfer it to a serving platter. The vegetables should be tender but still holding their shape—if they're too soft, they've absorbed all the pork's juices.
Pro Tips For Making Cider Braised Pork Roast
- SEAR THE PORK FIRST: Don’t skip browning that pork shoulder—it’s the flavor foundation. Hit it hard with 3-4 minutes per side until deep golden, then pull it out. I used to rush this, and the cider just tasted like... sad, thin gravy. A good crust locks in during the long braise.
- USE THICK CUT CARROTS: Skip baby carrots—they turn to mush. Go for 3-inch chunks (peeled or not, your call) so they hold shape. They’ll soften but stay substantial, and you’ll actually taste them in every bite. Yes, even if it looks like a cave painting.
- DEGLAZE WITH CIDER, NOT WATER: After searing, splash in ½ cup apple cider right away—it’s the only way to get that caramelized pork fond to lift. Water just makes a pale, flat sauce. The cider’s acid cuts through the richness, and you’ll get a glossy, tangy reduction instead of a dull pool.
- Braise Low and Covered: 300°F is your sweet spot—any hotter and the cider boils off too fast, leaving you with dry meat. Tightly cover the pot and resist peeking. I learned this after opening the lid twice and turning my pork into a sad, rubbery mess. Patience here makes all the difference.
Creative variations of this recipe
Southern Comfort Style
For a true taste of the Southeast, add ½ cup of chicken stock to the braising liquid along with 2 tbsp hot sauce (I like Crystal Hot Sauce) during the final 30 minutes of cooking. This gives you that signature Carolina tang that balances the sweet cider perfectly.
I also like to finish with a sprinkle of smoked paprika and serve it with cornbread and collard greens for a full Southern spread. 🌶️
Herb-Forward French Twist
Swap the fresh thyme and rosemary for ½ cup fresh tarragon and ¼ cup fresh parsley to give this a French bistro vibe.
Add 1 sprig fresh thyme and 1 sprig fresh rosemary to the braising liquid, and finish with a splash of dry white wine (about ½ cup) when deglazing. Serve with buttery mashed potatoes and sautéed green beans for a restaurant-worthy meal.
Spiced Rum Variation
For a festive holiday version, add 2 tbsp dark rum (like Appleton Estate) to the braising liquid during the final 1 hour of cooking. The rum caramelizes beautifully with the cider, adding depth and warmth.
I also like to finish with a sprinkle of cinnamon and nutmeg for extra spice. This version pairs perfectly with apple cider glaze for dipping and roasted Brussels sprouts.
Slow Cooker Adaptation
For hands-off cooking, transfer all ingredients to a 6-quart slow cooker and cook on LOW for 8-10 hours or HIGH for 5-6 hours. The slow cooker's gentle heat mimics the oven perfectly, and you'll end up with fork-tender pork.
Just add ½ cup water if the liquid gets too low during cooking. This method is ideal for busy weeknights or when you're hosting a crowd. 💡
Asian-Inspired Fusion
Give this dish an unexpected twist by adding 1 tbsp grated fresh ginger and 1 tbsp soy sauce to the braising liquid. Finish with a sprinkle of sesame seeds and serve over jasmine rice with steamed bok choy for a delightful fusion flavor.
The cider's sweetness pairs surprisingly well with the umami notes from the soy sauce, creating a unique balance of flavors.
Holiday Feast Upgrade
For a showstopping centerpiece, add ½ cup dried cranberries and ½ cup chopped pecans to the braising liquid during the final 30 minutes of cooking. The cranberries add a festive pop of color and tartness, while the pecans bring crunch.
Serve with wild rice pilaf and roasted sweet potatoes for a Thanksgiving-worthy meal that feels special but is simple to prepare.
Nutrition facts
Frequently asked questions
Can I use bone-in pork shoulder instead of a boneless roast?
Bone-in pork shoulder is actually preferred for this recipe. The bone adds extra flavor to the braising liquid, and the connective tissue creates even more tender, melt-in-your-mouth meat. Just be sure to remove any large bones before serving.
How do I know when the pork is fully tender?
The pork is done when it reaches an internal temperature of 200-205°F in the thickest part and easily shreds with two forks. If it's still tough, return it to the pot with the braising liquid and cook for another 15-20 minutes covered. The meat will continue cooking from residual heat.
What can I do if my braising liquid reduces too much?
If the liquid gets too low during cooking, simply add ½ cup water or apple cider to maintain the right level. The key is to keep the pork partially submerged so it steams gently. For extra richness, you can also add ¼ cup chicken stock instead. Just don't overdo it—too much liquid will dilute the flavors.
Can I make this recipe in a slow cooker?
Yes! Transfer all ingredients to a 6-quart slow cooker and cook on LOW for 8-10 hours or HIGH for 5-6 hours. The slow cooker's gentle heat works perfectly, and you'll still get that same tender, flavorful result. Just add ½ cup water if the liquid gets too low during cooking.
What's the best way to reheat leftovers?
Reheat leftovers gently in the same braising liquid over low heat for 10-15 minutes until warmed through. The sauce will thicken as it cools, so add a splash of water or cider if needed. Alternatively, you can reheat portions in the microwave for 2-3 minutes covered, but the stove method keeps everything juicier.