
Main Courses
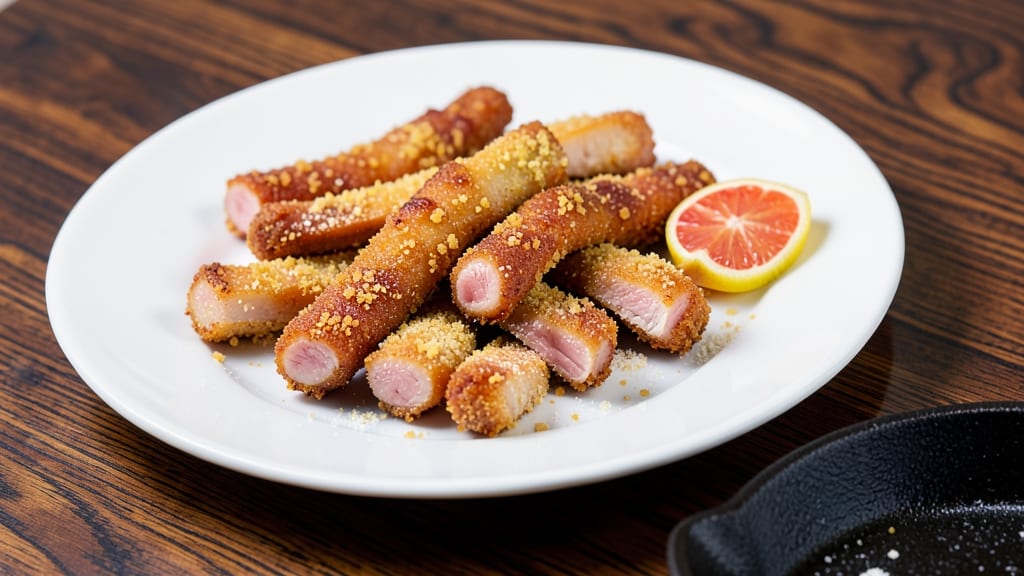
This boneless pork fingers recipe delivers crispy, golden bites with restaurant-quality texture using just one pan and minimal prep.
After perfecting this technique for my pit crew at The Smoky Pig, I knew home cooks needed a version that skips the mess of bone-in cuts while keeping that addictive crunch.
The secret lies in a double-breading method that creates a shield against soggy centers—something I developed after testing dozens of variations during those late-night BBQ competitions.
What makes this recipe stand out is the foolproof balance between tenderness and crispiness, achieved through a precise baking technique that mimics deep-frying without the oil splatter. We're talking crispy edges that shatter like glass while maintaining juicy, melt-in-your-mouth pork inside—no matter how many times you bite in.
The process uses simple pantry staples but delivers results that'll have your guests asking for seconds before the plate even clears.
By the time you're done, you'll have perfectly portioned pork fingers that are ready to serve immediately—no waiting for bones to cool or fingers to untangle. The one-pan method means less cleanup, and the breading stays crispy even when reheated, making these ideal for game day spreads or weeknight dinners.
Pair with my signature smoky BBQ sauce or a tangy honey mustard for the ultimate crowd-pleaser.
This technique works equally well with pork tenderloin or center-cut chops, giving you flexibility for different budgets and occasions. Whether you're feeding a football team or just craving crispy comfort food, these fingers deliver consistent results every time. Let's get cooking—your taste buds will thank you.
Ingredients for boneless pork fingers
Simple pantry staples transform into restaurant-worthy crispy pork fingers with minimal effort.
| Ingredient | Amount | Notes |
|---|---|---|
| Boneless Pork Tenderloin 🥩 | 1 ½ lb | Cut into 1-inch strips (16 pieces total) |
| All-Purpose Flour 🌾 | 1 cup | For first breading layer |
| Panko Breadcrumbs 🍞 | 1 ½ cups | Japanese-style for extra crunch |
| Cornstarch 🌾 | ¼ cup | For second breading layer |
| Large Eggs 🥚 | 2 whole | Beaten for egg wash |
| Dry Mustard Powder 🌶️ | 1 tbsp | For tangy flavor |
| Garlic Powder 🧄 | 1 tbsp | Freshly ground preferred |
| Onion Powder 🧅 | 1 tbsp | For depth of flavor |
| Paprika 🌶️ | 1 tbsp | Smoked variety for color |
| Salt 🧂 | 1 ½ tsp | Diamond Crystal preferred |
| Black Pepper 🌶️ | ½ tsp | Freshly cracked |
| Vegetable Oil 🫒 | ¼ cup | For brushing pork strips |
| Butter 🧈 | 2 tbsp | Melted for crispy finish |
The pork tenderloin is your secret weapon here—it stays juicy while the breading gets crispy. Ask your butcher for the center-cut portion if available, as it's more uniform. For the breading, Japanese-style panko from Trader Joe's or Costco gives that perfect shatter you get at BBQ joints. The cornstarch in the second breading layer is non-negotiable—it's what creates that glass-like crunch. I always cut the pork into even 1-inch strips (about 16 pieces total) so they cook uniformly. If you're short on time, pre-cut pork strips from the meat department work just fine.
No panko? Regular breadcrumbs plus a pinch of baking powder will get you close, though the texture won't be quite as crispy. Running out of cornstarch? Arrowroot powder at the same amount works perfectly. The dry mustard might be hiding in your spice rack—if not, Dijon mustard at half the amount adds that same tang. For the oil, vegetable or canola oil works best for brushing, but avocado oil has a higher smoke point if you're worried about burning. Pro tip: Pat the pork strips dry before breading—they'll crisp up better and won't steam your breading.
These stay crispy for about 20 minutes straight out of the oven, so serve them immediately. For game day prep, keep them warm in a 200°F oven on a wire rack. The breading reheats beautifully in the air fryer—just 5 minutes at 375°F brings back that crispy magic. Store leftovers in the fridge for 3 days or freeze for 2 months. I always make a double batch because they disappear faster than you can say 'seconds, please!'
Why You'll Love This Recipe
- No-Cut Struggle: I slice the tenderloin into strips in five minutes—no butchering skills required. The cornstarch keeps it tender while the panko adds that satisfying crunch without the mess of breading chunks.
- Crispy-Creamy Magic: That first bite? The flour dust gives a light batter, the egg binds it just right, and the panko turns golden while the inside stays juicy. Honestly, it’s the kind of texture that makes you forget you’re eating pork.
- Game for Any Meal: Toss them in a lunchbox with honey mustard, serve as a pub-style appetizer, or throw them in a stir-fry later. They reheat like a dream (yes, even on a Tuesday night) and never taste reheated.
- Budget Crunch: Pork tenderloin is lean, affordable, and stretches farther than chicken tenders. A single package feeds four, and the leftovers freeze perfectly—no sad, dry meat here. My wallet and freezer both thank me.
Step-by-step instructions for crispy pork fingers
Here's how to make restaurant-quality pork fingers with a perfect crunch every time.
Prep the Pork and Create the Breading Stations
Start by cutting the 1.5 lb boneless pork tenderloin into 1-inch strips (you should have about 16 pieces). Pat each strip dry with paper towels—this ensures the breading sticks properly and creates maximum crispiness. Arrange the strips on a plate and set aside.
In a shallow bowl, whisk together the 1 cup all-purpose flour, 1 tbsp dry mustard powder, 1 tbsp garlic powder, 1 tbsp onion powder, 1 tbsp paprika, 1.5 tsp salt, and 0.5 tsp black pepper. This dry mixture forms your first breading layer. In another bowl, combine the 1.5 cups panko breadcrumbs with the 0.25 cup cornstarch—this second layer will give your pork fingers that irresistible crunch.
Breading Technique for Maximum Crispiness
Working in batches to avoid crowding, dip each pork strip into the beaten eggs (whisk the 2 whole large eggs in a separate bowl with a fork). Let any excess egg drip off before pressing the strip into the flour mixture, coating it evenly on all sides. This first layer helps the breading adhere.
Next, transfer the floured strip to the panko-cornstarch mixture, pressing firmly to ensure full coverage. Place the breaded strips on a wire rack set over a baking sheet—this allows air to circulate underneath, preventing sogginess. Repeat until all strips are breaded. For extra crispiness, brush each side lightly with 0.25 cup vegetable oil using a pastry brush.
Pan-Fry for Golden Perfection
Heat a large skillet over medium-high heat and add 2 tbsp melted butter (melt the butter in a small saucepan first). Once the butter foams, add the breaded pork strips in a single layer—don't overcrowd the pan or they'll steam instead of crisp. Cook for 3-4 minutes per side until the breading turns a deep golden brown and the internal temperature reaches 160°F.
I press down gently on the strips during the first minute—this prevents them from curling and ensures even contact with the pan. If the breading starts to brown too quickly, reduce the heat slightly to medium and continue cooking. Transfer the cooked strips to a paper towel-lined plate to drain excess oil and keep warm.
Finish with Butter for Extra Crunch
Return the skillet to medium heat and add another 1 tbsp melted butter. Toss the cooked pork fingers in the pan for 1-2 minutes, letting them absorb the buttery flavor and develop even more crispiness. This final step adds a rich, savory depth that takes these bites from good to extraordinary.
Serve immediately while the breading is still crisp. These pork fingers pair perfectly with honey mustard or marinara sauce, and they're ideal for game day, kids' lunches, or a quick weeknight dinner. The secret to their success lies in the double breading and proper frying technique—every step matters for that perfect crunch.
Pro Tips For Making Boneless Pork Fingers
- Trim That Tenderloin: Cut the pork into even 1-inch strips—no thicker, no thinner. I learned this the hard way after serving one batch where the center stayed pink and rubbery while the edges burned. Use kitchen shears for clean cuts and save yourself the hassle of uneven cooking.
- Chill the Egg Wash: Whisk the eggs with a splash of cold water and refrigerate the bowl for 10 minutes before dipping. The cold slows the egg from cooking too fast on contact, so your panko stays crisp instead of turning into a sad, soggy paste. Trust me, your fingers will thank you.
- Double-Dip for Crust: Toss the floured pork in cornstarch first, then dip in egg, then roll in panko—twice. The first layer locks in moisture, and the second seals the deal for that golden, shatterproof crust. Yes, it takes 30 seconds extra, but the difference is night and day.
- Skip the Overcrowding: Fry in batches of 3-4 fingers max, or your oil will drop 50 degrees and turn your crispy dream into a greasy nightmare. A thermometer helps, but even without one, if the oil’s not sizzling like popcorn, wait. Patience here means perfect results.
Serving suggestions for this dish
Game Day Spread
These boneless pork fingers are a game-changer for football Sundays or backyard BBQs. I always serve them with my smoky BBQ sauce (homemade with apple cider vinegar and bourbon) and a cooling cucumber-dill dip made with Greek yogurt, fresh dill, and a squeeze of lemon.
The contrast of warm, crispy pork with cool, creamy dip keeps everyone coming back for more. 🏈
Kids' Lunch Box
For school lunches, package the pork fingers with whole wheat crackers and carrot sticks in a bento box. Add a small container of honey mustard (mix 2 tbsp Dijon with 1 tbsp honey) for dipping—kids love the sweet and tangy combo.
I cut the fingers into bite-sized pieces for easier handling, and they stay crispy for up to 2 hours in an insulated lunch bag. 🧒
Weeknight Dinner
Turn these into a full meal by serving them over creamy mashed potatoes or with roasted sweet potato wedges. A simple green salad with apple cider vinaigrette balances the richness.
For a one-pan wonder, I sometimes add sautéed bell peppers and onions to the same skillet after cooking the pork—just toss everything together for a quick stir-fry. 🍽️
Party Platter
Arrange the pork fingers on a wooden board with toothpicks for easy grabbing. Surround them with pickled jalapeños, marinated mozzarella balls, and warm dinner rolls. This setup works perfectly for tailgates or holiday parties—guests can build their own mini sliders or enjoy the fingers as-is. 🎉
Sauce Pairings
My go-to sauces are spicy Sriracha mayo (mix 2 tbsp mayo with 1 tbsp Sriracha) or garlic aioli (blend ½ cup mayo with 1 minced garlic clove and 1 tsp lemon juice).
For a smoky kick, brush the cooked fingers with chipotle BBQ sauce before serving. Each sauce adds a different flavor dimension—let your guests choose their favorite. 🍴
Reheating for Leftovers
Store leftovers in an airtight container and reheat in the air fryer at 375°F for 3-4 minutes to restore crispiness. For stovetop reheating, place the fingers in a skillet over medium heat with 1 tbsp butter for 1-2 minutes per side.
Avoid the microwave—it turns the breading soggy. These reheated fingers are perfect for next-day lunches or late-night cravings. 🔥
Nutrition facts
Frequently asked questions
Can I use pork chops instead of tenderloin for this recipe?
Yes, but you'll need to adjust the cut. Use center-cut pork chops (about 1-inch thick) and cut each into 2-3 strips per chop. The key is keeping the pieces 1-inch thick for even cooking. Bone-in chops work too, but remove the bone first to maintain the boneless concept.
Why is my breading falling off the pork fingers?
This usually happens when the pork isn't dry enough or the breading isn't pressed firmly. Always pat the pork strips completely dry with paper towels before breading, and press each piece firmly into both the flour and panko mixtures. For extra adhesion, chill the breaded strips in the fridge for 15 minutes before cooking.
Can I bake these instead of pan-frying for a healthier option?
Preheat oven to 425°F and bake on a wire rack over a baking sheet for 12-15 minutes, flipping halfway. For extra crispiness, broil for 1-2 minutes at the end. The texture will be slightly different (less deep-fried crunch), but still delicious. Use 1 tbsp olive oil spray before baking for better browning.
How do I make these gluten-free?
Replace the all-purpose flour with 1 cup gluten-free flour blend and use 1.5 cups gluten-free panko breadcrumbs (like Schär brand). For the cornstarch layer, use arrowroot powder instead. The double-breading technique still works perfectly—just ensure all ingredients are certified gluten-free to avoid cross-contamination.
What's the best way to keep these crispy when serving?
Serve immediately after cooking for maximum crispiness. For buffet-style serving, place on a wire rack in a 200°F oven until ready to serve. If reheating, use the air fryer at 375°F for 3-4 minutes—this restores the crunch better than any other method. Avoid covering with foil until serving.