
Main Courses
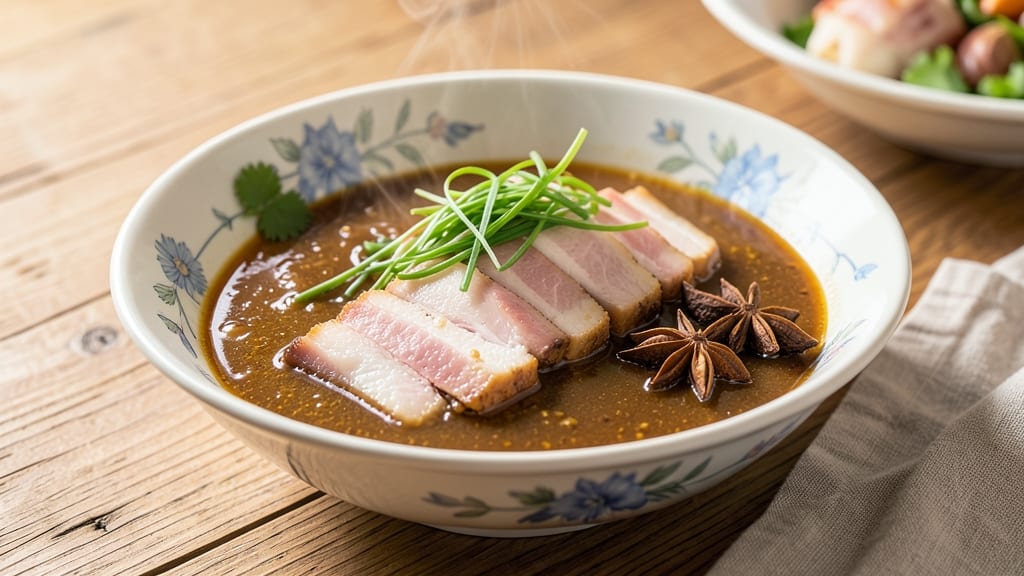
This Chinese pork stock recipe is the secret weapon behind every authentic stir-fry and soup in my kitchen—packed with deep umami flavor that transforms ordinary dishes into restaurant-quality meals. 🔥 As someone who's spent years perfecting pork-based stocks, I can tell you the difference between a good stock and a great one comes down to technique: roasting the bones for color, simmering low and slow, and using the right aromatics to build complex flavor layers.
The foundation starts with pork bones—preferably from the neck or trotter—roasted until deeply caramelized to develop that rich, savory depth. We're talking 4-6 hours of simmering time, but trust me, every minute pays off in flavor.
The key ingredients include ginger, star anise, and a splash of Shaoxing wine, which work together to create a stock that's both aromatic and balanced—never overpowering.
What you'll end up with is a rich, golden stock that's perfect for braising meats, making congee, or adding depth to stir-fries. The beauty of this recipe is its versatility—it keeps well in the freezer for up to 3 months, so you'll always have a flavorful base on hand.
I've used this stock in everything from dumplings to noodle soups, and it elevates each dish instantly.
For those short on time, I'll share my pressure cooker adaptation in the tips section—it cuts the cooking time dramatically without sacrificing flavor. But for the full experience, the slow method is worth the wait. Let's get started on building your flavor foundation.
Ingredients for chinese pork stock
The aromatic backbone of authentic Chinese cooking—rich, golden, and packed with umami.
| Ingredient | Amount | Notes |
|---|---|---|
| Pork Bones 🍖 | 4 lb | Neck or trotter preferred, cut into chunks |
| Fresh Ginger 🧅 | ½ cup | Sliced into thick rounds, skin on |
| Star Anise Pods 🌿 | 4 whole | Lightly crushed for aroma release |
| Shaoxing Wine 🍷 | ½ cup | Dry Chinese cooking wine |
| Garlic Cloves 🧄 | 8 cloves | Smashed, not minced |
| Green Onions 🧅 | 2 whole | Cut into 2-inch pieces |
| Dried Scallions 🌿 | 1 tbsp | For extra umami depth |
| Light Soy Sauce 🥄 | 2 tbsp | Kikkoman preferred |
| Dark Soy Sauce 🥄 | 1 tbsp | For color and sweetness |
| Rock Sugar 🍚 | 2 tbsp | Or substitute brown sugar |
| Water 💧 | 12 cups | Filtered preferred |
| Salt 🧂 | 1 tsp | Kosher sea salt |
| Black Peppercorns 🌶️ | 10 whole | Lightly crushed |
Pork bones are the star here, and neck or trotter deliver the deepest flavor. Ask your butcher for pork trotter bones—they're worth the hunt for that extra gelatinous richness. If you can't find them, pork knuckle bones work too. Roast them until deeply caramelized (about 45 minutes at 400°F) before simmering—this step is non-negotiable for that restaurant-quality depth. For ginger, grab the freshest root you can find—it should be firm with no soft spots. The star anise? Whole Foods or Asian markets usually carry them in bulk bins, which is where I always shop.
No Shaoxing wine? Dry sherry or even a splash of white wine vinegar works in a pinch, but the flavor won't be identical. The rock sugar can be swapped for brown sugar (same amount), but it won't have that same caramelized depth. For the soy sauces, Kikkoman light soy and Lee Kum Kee dark soy are my go-tos, but any good-quality brands work. Short on time? Pressure cook for 2 hours instead of 6—still delicious, just faster. And if you've got dried shiitake mushrooms lying around, toss in 2-3 soaked pieces for extra umami punch.
This stock keeps for 5 days in the fridge or 3 months in the freezer—make a double batch. I like to freeze it in ice cube trays for easy portioning. For the best flavor, let it come to room temperature before using. Pro tip: Strain through a fine-mesh sieve lined with cheesecloth for the smoothest texture. The first batch will always be the best—subsequent batches use the bones again, but they'll be slightly less rich.
Why You'll Love This Recipe
- One-Pot Magic: I swear by this recipe because it’s literally dump-and-simmer. No straining bags, no extra pots—just toss the pork bones, ginger, star anise, and garlic into a pot, add water and wine, and let it work its magic. Honestly, I’ve made it while scrolling through my phone.
- Umami Bomb: That first sip? Chef’s kiss. The pork bones melt into rich, deep flavor, while the star anise and Shaoxing wine add this warm, slightly sweet complexity. It’s the kind of stock that makes you pause mid-sip—like, "Wait, I’m drinking flavor?"
- Stockpile Savior: Between us, I always have a jar of this in the fridge. Use it for stir-fries, dumplings, or even ramen—it’s the backbone of so many meals. And because it’s so rich, a little goes a long way. (Yes, even on a Tuesday night.)
- Budget Upgrade: Pork bones are cheap, but this stock tastes like a splurge. I buy them in bulk, freeze extras, and turn a $5 bag into something that makes my house smell like a dim sum restaurant. No waste, all reward.
Step-by-step instructions for Chinese pork stock
Here's how to make a rich, aromatic pork stock perfect for soups and stir-fries.
🔥 Step 1: Parboil the Pork Bones for Maximum Flavor
Place the 4 lb pork bones in a large stockpot and cover with 8 cups of the 12 cups water. Bring to a boil over medium-high heat, then immediately reduce to a simmer. Skim off any foam that rises to the surface with a fine-mesh skimmer—this removes impurities and keeps your stock clear. Simmer uncovered for 30 minutes, stirring occasionally to prevent sticking.
This initial parboiling step is crucial. It removes blood and impurities from the bones, which would otherwise cloud your stock. After 30 minutes, drain the water completely and rinse the bones under cold water. This thorough cleaning ensures your final stock will be crystal clear with deep, clean flavor.
🍳 Step 2: Build the Aromatic Base
Return the cleaned pork bones to the now-empty stockpot. Add the 0.5 cup fresh ginger, 8 cloves garlic cloves, 2 whole green onions, 1 tbsp dried scallions, 4 whole star anise pods, 10 whole black peppercorns, 2 tbsp rock sugar, 1 tbsp dark soy sauce, and 2 tbsp light soy sauce. Pour in the remaining 4 cups water to cover everything.
Bring the mixture to a gentle boil over medium heat, then immediately reduce to a low simmer. The water should barely bubble—you're looking for small, occasional bubbles that don't disturb the surface. This gentle simmer is key to extracting maximum flavor without breaking down the collagen in the bones too quickly. Let it cook uncovered for 2 hours.
🍳 Step 3: Add the Shaoxing Wine and Simmer Long
After the initial 2 hours, add the 0.5 cup Shaoxing wine and the 1 tsp salt. Stir gently to combine. The wine adds depth and complexity to the stock, while the salt enhances all the flavors. Return to a gentle simmer and continue cooking for another 4-6 hours, maintaining that low, steady bubble.
Here's where the magic happens: the long simmer breaks down collagen in the bones, transforming them into gelatin that gives your stock its signature richness. You'll notice the stock gradually darkens and thickens slightly—this is normal and desirable. The aroma should become intensely savory and slightly sweet from the soy sauces and rock sugar.
⏰ Step 4: Strain and Rest for Maximum Clarity
Once the pork bones are completely tender and the stock has reduced slightly (about 1½ quarts total), remove the pot from heat. Let the stock sit undisturbed for 15 minutes—this allows any remaining impurities to settle at the bottom. Then carefully strain through a fine-mesh sieve or cheesecloth-lined colander into a clean container.
For extra clarity, you can chill the stock in the refrigerator overnight. The fat will solidify on top and can be skimmed off before reheating. Store the stock in airtight containers in the refrigerator for up to 5 days, or freeze for up to 3 months. This rich, umami-packed stock is the perfect base for any Chinese-inspired dish!
Pro Tips For Making Chinese Pork Stock
- BLANCH BONES FIRST: Skip the slow start—parboil bones in boiling water for 10 minutes before simmering. I learned this the hard way after making stock that tasted more like a swamp than a restaurant. This removes impurities and speeds up collagen extraction, so you’re not staring at a pot for hours wondering why it’s still cloudy.
- PEEL GINGER THIN: Use a spoon to scrape off just the outer skin, leaving the thickest part of the root intact. My grandmother swore by this, and she was right: thin slices infuse flavor without turning the stock bitter or stringy. No need to chop—just slice into ½-inch coins and toss them in.
- LOW AND SLOW WINS: After the initial boil, drop the heat until you see tiny bubbles at the edges—no rolling simmer. I used to rush this, and the stock would turn murky or taste scorched. Patience here guarantees a clear, rich broth that’ll make your dumplings or congee taste like a Michelin-starred version.
- CRUSH STAR ANISE: Lightly smash the pods with the side of your knife before adding them. Sounds weird, but it works: this releases the aromatic oils faster, so your stock gets that deep, fragrant base without waiting an extra hour. Just don’t pulverize it—you still want to strain it out later.
Common mistakes when making your chinese pork stock
Skimming Neglect
I can't stress this enough: skipping the skimming step is the #1 mistake people make with pork stock. That foam rising to the surface during the initial parboil contains blood and impurities that will cloud your stock and make it taste bitter.
Use a fine-mesh skimmer and work quickly—don't let that foam sit for more than 5 minutes before removing it. I've seen home cooks leave it too long, and suddenly you're dealing with a murky, off-flavored stock instead of that crystal-clear golden liquid we're aiming for. 💛
Overcrowding the Pot
Another common error is overfilling the stockpot, which leads to two major problems: uneven cooking and a weaker final product. Your pork bones should be fully submerged but with at least 1 inch of headspace above the liquid.
If you're using a 12-quart stockpot, stick to 4 pounds of bones max—any more and you'll trap steam, preventing proper collagen breakdown. I've had students bring me stocks that tasted watery because they packed too many bones. Trust the measurements!
Boiling Too Vigorous
Watch out for rolling boils—this breaks down collagen too quickly, resulting in a thin, watery stock instead of that rich, gelatinous goodness. You want gentle simmering—small bubbles at the surface, not violent bubbling. If you see big bubbles, reduce the heat immediately.
I recommend using a thermometer to maintain 185-195°F throughout the simmering process. This might seem fussy, but it makes all the difference in the final texture and flavor depth. 🌡️
Rushing the Simmer Time
I've lost count of how many times I've heard, "Can't I just speed this up?" The answer is no—well, not if you want authentic flavor. The 4-6 hour simmer is non-negotiable for developing that deep umami.
Cutting it short to 2 hours or less means you're missing out on the collagen conversion that gives the stock its signature body. If you're short on time, I'll share my pressure cooker adaptation in the tips section, but even that takes 2 hours—don't skimp on time here.
Ignoring the Wine Addition
Many home cooks skip the Shaoxing wine entirely, thinking it's optional. Big mistake! That ½ cup of wine adds complexity and brightness that balances the richness of the pork. If you omit it, your stock will taste flat and one-dimensional.
Pro tip: Add the wine after the initial 2-hour simmer—this prevents it from burning and allows it to infuse properly. I've tasted stocks missing this step, and they're noticeably less vibrant. 🍷
Poor Straining Technique
Using just a regular colander to strain your stock is a rookie move. The tiny bone fragments and gelatinous bits will pass through, leaving your stock cloudy and gritty. Instead, line your fine-mesh sieve with cheesecloth or butterfly mesh for that restaurant-quality clarity.
I've seen home cooks pour stock through a regular strainer, then complain about the texture—don't be that person! Take the 15 extra minutes to strain properly, and your stock will look and taste professional. ✨
Nutrition facts
Frequently asked questions
Can I use regular pork bones instead of neck or trotter?
Yes, but you'll lose some depth of flavor. Neck and trotter bones have more connective tissue and marrow, which create that signature richness. If you only have knuckle or rib bones, add 1 extra tablespoon of rock sugar and simmer 30 minutes longer to compensate for the reduced collagen. For best results, ask your butcher for a mix of neck and knuckle bones.
How do I make this stock in a pressure cooker?
Follow the same initial steps (parboiling and cleaning), then add all ingredients to your pressure cooker. Seal and cook on high pressure for 2 hours—no need to add extra water. Release pressure naturally, then strain. This cuts cooking time by 60% while keeping the same depth of flavor. Just remember: pressure cooking develops gelatin faster, so the stock will thicken more quickly.
What's the best way to use leftover pork bones?
After making stock, roast the leftover bones at 400°F for 20 minutes, then use them for a second batch by adding 2 cups fresh water and 1 cup new aromatics. Simmer for 2-3 hours—the flavor will be good but less rich than the first batch. For maximum value, freeze bones in portions for future quick stocks. I've made 3 batches from the same bones with diminishing but still excellent results.
Can I substitute Shaoxing wine with something else?
For best results, use dry sherry or white wine vinegar—both add acidity that mimics Shaoxing's complexity. If using vinegar, reduce to ¼ cup and add it with the salt at the 4-hour mark to prevent overpowering. For a non-alcoholic version, try rice vinegar at half the amount, but the flavor won't be identical. The wine's alcohol helps extract more flavor from the bones during simmering.
How do I know when the stock is done?
Your stock is ready when the pork bones are completely tender and the stock has reduced to about 1½ quarts with a rich, golden color. Test doneness by poking a bone—if it separates easily, it's done. The aroma should be intensely savory with notes of ginger and soy. If you're unsure, let it simmer 15 more minutes**—it won't overcook, but under-simmering will leave it thin and flavorless.